Rocker Switch Wiring Diagrams
WIRING DIAGRAMS OVERVIEW:
Each of our Carling Rocker Switch Bodies have the generic wiring diagram loaded into that product’s own page (see photo, right). Many of these switches though are quite flexible thought. With just a few small jumpers our switch selection can be used for a multitude of different functions. In a constant state of improvement, we’ll update this page each time we develop a new rocker switch wiring diagram for a specific need. The wiring diagrams below are in an “instructional guide” format for ease of use during an install.
Each wiring diagram is downloadable and printable for use during your installation. If you have a need for specialty wiring of a switch, let us know and we’ll see if we can develop a instructional wiring sheet for your specific need.
Now, from here down on the page we’ll be uploading our super-useful “specialty use” wiring diagrams. We’re trying to put loads of good info in these downloadable wiring diagrams. Some of them can get pretty lengthy, but are chocked full of great tips.
As always, if you have purchased – or are looking to purchase – some of our switches, please feel free to give us a shout at (843) 297-8348, and we’d be happy to talk through any of your wiring challenges (We are called rocker switch “pros” after all).
ON-OFF-ON DPDT rocker switch wiring diagram
In this downloadable wiring diagram guide, we’ll discuss a Double Pole Double Throw (DPDT) rocker switch. And how to make this switch with two independent lights into a backlight (top) and indicator (bottom).
We often find ourselves wanting to use one rocker switch for 2 different loads, one when UP and another when DOWN. A boat owner wanting to FILL the livewell when UP, and AERATE the livewell when down for instance. Obviously we’d turn to an ON-OFF-ON switch, but when utilizing backlights as well, it gets a little more complicated b/c the upper lamp is now reserved for the backlight, and can’t be used as an indicator.
We do have a several rocker switches that can make this work though… they are the VJD2-U66B (white), VJD2-UCCB (red), and the VJD2-UCCB (blue). Each of these Carling switches have two independent lamps that can be controlled via a series of jumpers. Click the guide below to see a complete guide, instructions and a rocker switch wiring diagram and schematic on how to make it work!
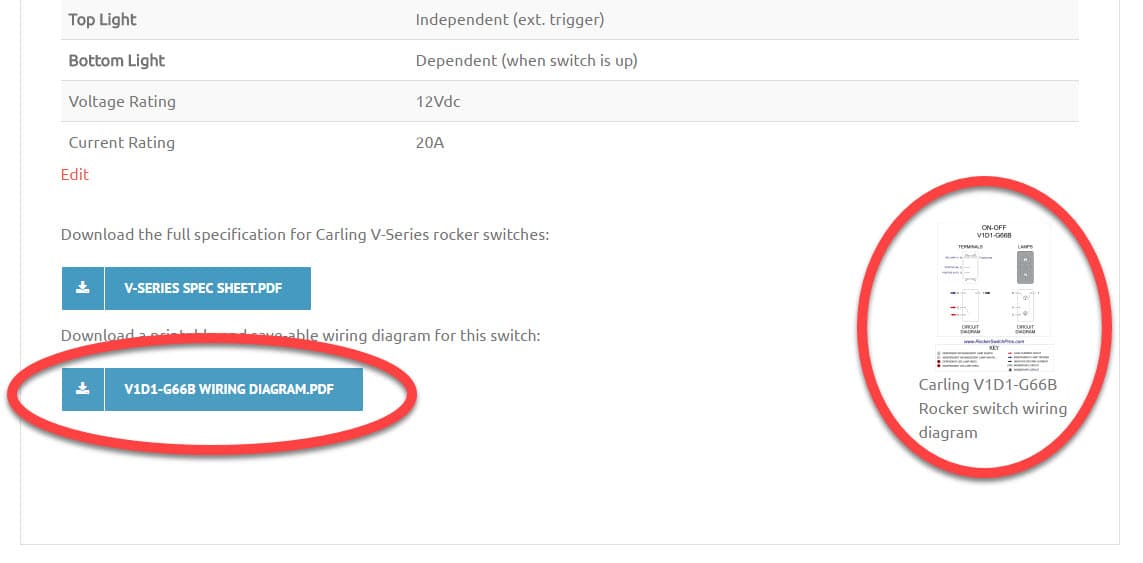
Boat’s Navigation / Anchor wiring diagram
Here’s a common one for our customers. This guide applies to these switch bodies: VJD2-U66B (white), VJD2-UCCB (red), and the VJD2-UCCB (blue).
You’ll find these wiring diagrams and guide handy when you want want backlit switches, but you don’t want your nav/anc switch to power the backlights or if you want red or blue LED lighting. When you do want the nav / anchor switch to power the backlights, and have white lights then you’ll need this rocker switch, which is technically not an independent lamp (but you don’t really need one in this case).
Anyway – in short, you need two loads to come on when the witch is UP, and only one load to come on when the switch is DOWN right? That’s no problem, EXCEPT you want the top light independently triggered by another rocker switch. This is often something like a panel lights, or gauge light switch.
A lot of boaters prefer this so that they can separately trigger the switch backlighting independent of the running lights. Very helpful if you’re concerned about the illumination of the rocker switch backlights interfering with your night vision while running (after all, you need your running lights on when cruising at night on the boat).
While written specifically for a boat’s navigation and anchor switch, this wiring diagram will also be helpful for other industries or vehicles, like front and rear lights, or windshield wipers. Again… when you want switch backlighting, and ONE or BOTH of two different loads to come on.
There’s also a useful explanation in this puppy about how to use a terminal block instead of jumpers on the back of a jam-packed 10 terminal rocker switch (page 5). And an short schematic (page 6) on how to jump terminals 8 and 7 together on ON-OFF switches for backlighting.
